Woohoo, I got an MC-4. I should write it up, it’s an interesting sequencer.
ANYWAY, here’s some tape sync tones from it, familiar to anyone who spent forever watching flashing home computer loading screens as a kid, just willing it to load on the seventh time around.
I’ve been building a couple of Sympleseq analogue sequencers from hexinverter and they’re coming on, most of the soldering is done.
Essentially, they’re basic analogue 8 step sequencers based on a 4017 decade counter, offering note on/off/reset per step. There’s an internal clock provided by a 40106 with quite a wider range, and there’s an option for externally clocking, although you’ll have to get quite close to the input voltage to clock it. I’ve not had any success yet in my brief attempt at trying to directly clock it from an MFB Dual LFO.
Here’s the rather lovely Eurorack-sized panel – hats off to Ben at resynthesis.co.uk, he’s done a great job, I’m really happy with this:
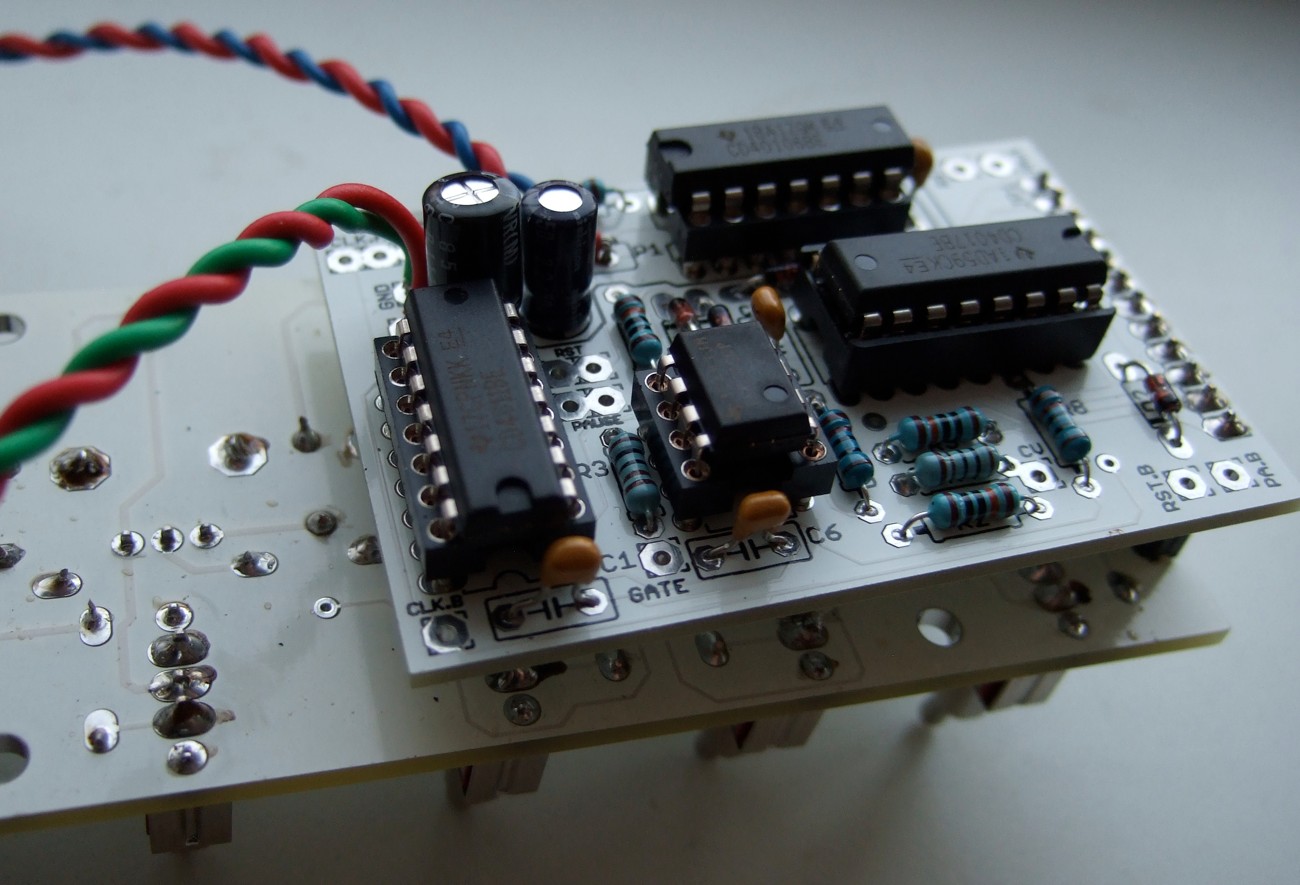
This is the logic board, attached by a header on the right hand side to the switch board, it’s a bit wobbly:
Here’s a (mildly chopped up) really quite horrible drum loop I sequenced from the Simpleseq, sound source being a homemade Polivoks filter and a Doepfer noise source mixed together, with a bit of spring reverb and occasional delay from an RE-201.
I was trying to be a bit Human League circa Reproduction, as ever.
Hats off to Mr Gaudreau for getting this out, they are good for the money. Having said that, I’m not keen on the switches, which are very easy to burn up when you’re soldering, although the build manual does give fair warning about this. Not that I read manuals *cough*. To Stacey’s credit he does recognise this and include a couple of extra switches in case you do fuck up. Which I did. But only twice.
Also I think as a function of trying to fit two sequencers into a small space, the switches are pretty small and… not really the best. They seem to be a bad combination of stiff and fragile – I managed to snap one in my fingers when trying to switch it down… it’s also hard to tell when they’re on, off or set to reset.
On the positive side, it’s really good that the sequencers work off a single sided power supply, so you can attach a 9v battery and start bleeping. It’s also not very deep, so it could be fitted in a slim desktop case, which is my current plan.
Because they’re based on 4017 decade counters, there are no extra features like reverse play, or pendulum or CV control over which step is played next. All the attempts I’ve seen so far at linking two 8 step Sympleseqs together to make a 16 step sequencer have been a bit tricky, the most reliable seeming to be switching on each trigger between the two sequencers, rather than switching at the end of 8 steps.
Thinking about it a bit more, it would be fairly easy to replace the two logic boards with an Arduino Nano, and use a pair of shift registers to drive the sixteen steps, with the remaining digital and analogue ins used for selecting playback modes. I say easy, it just takes time.
I’ve been working on my silly cardboard-faced Arduino CV/gate sequencer thing. My previous post (Beginning CV/gate sequencing with the Arduino) outlined the idea, here’s my criteria:
it should work like the Roland CSQ-100 (or SH-101) step sequencer
sequence hz/v or 1v/oct synths
allow the user to change patterns and record/edit sequences while it plays (like the TR-606)
should be super-tight
Here’s a video of where I’ve got to, with lots of annotations to explain what on earth these unlabelled buttons do.
It’s now based on an Arduino Mega, mostly because I was always on the edge of running out of pins. I got fed up with having to wire up shift registers for the buttons. And then I got fed up with having to wire buttons, so having been obsessed with the idea of the Roland MC-4, I added a numeric keypad. (Eventually it’ll be able to email as well, right?). It’s handy having the seemingly endless 128KB of program memory, I was bumping up against the Atmega168 memory limit of 16KB on a previous project.
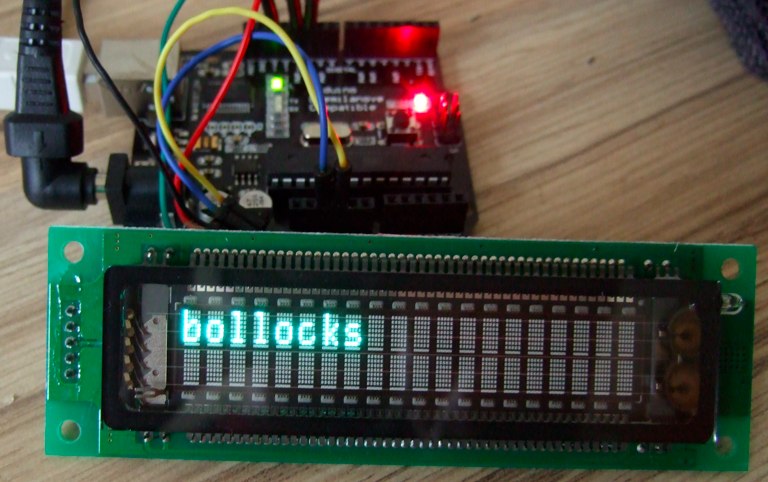
I wanted lots of LED displays, mostly because I was trying to ape the MC-4’s measure, step, and data display – so the previous version had three of them (demo video here). But carelessly I killed one of them, and then realised they were expensive for the amount of information they display. Instead I got hold of a suitably retro Samsung 20T202DA2JA vacuum fluorescent display (datasheet), which is lovely. Here’s my first childish first fiddle with it:
This time, rather than just storing voltages (read in by the onboard 10-bit ADC), I’m using a lookup table to store a key number based on the input voltage from the synth keyboard. This saves a bit of EEPROM space, but it also means I can allow for transposing the sequence from the connected keyboard, which is a replication of the KCV Add feature on the CSQ-100.
On playback, the program uses another lookup table to convert the note number to a number between 0 and 2048, corresponding to 0 and 5v. I’ve fiddled around with these numbers to get them as close to the note frequencies as possible. I’d use a different lookup table for v/oct and hz/v synths – this has a nice side effect in that I could have a hz/v keyboard controlling a 1v/oct synth. Also I could use further custom lookup tables for synths that are scaled differently, so it could be handy for controlling my cv/gate modded SH-1000 that runs closer to 1.3v/oct.
Because it can only output a maximum of 5v (using a very cheap Microchip MCP4922 dual DAC, following along with Mr Book’s post Controlling a Gakken SX-150 synth with Arduino), this means I’m getting just over 2 octaves on the MS20, but should be over 4 on anything 1v/oct. Before I added the slide circuit, I was getting better than +/- 2 cents across the range on the MS, which is acceptable to me.
Currently each (max 32 step) pattern uses a byte each for note number, gate length, aux control voltage, and switches, which are currently rest, tied note, and slide. I’ve had another trigger output (called MPX on the MC-4) working as well, which worked well for switching in LFO modulation for certain notes on the MS20.
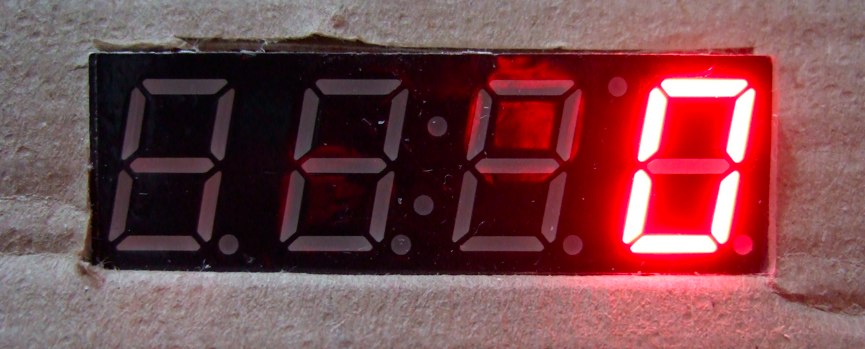
Each pattern uses 129 bytes of storage space – 128 bytes for the pattern itself and one for the length. On my previous attempt I was storing patterns in the Arduino internal flash, but on this version I’ve moved to an external 512 kilobit (64 kilobyte) 24LC512 EEPROM, following Cutedigi’s tutorial. Writing a 128 byte page is slow, taking at least 5ms, so to avoid interrupting the playback, saving and loading is scheduled for directly after a note trigger. This currently has the side effect that it has to be playing to save something, which isn’t so good. As far as possible I also update the screen directly after a note trigger, although it may not such an issue with the SPI VFD display as with the slower Sparkfun LED displays. Here’s one that I’m currently using for the step display, glowing ultrabrightly:
Because it’s so much fun to play with, it’s easy enough just to sit there twiddling with it and not actually getting it finished. It seems to spit out little melodies that I wouldn’t naturally come up with sitting at the keyboard.
In particular, the transpose function is a lot of fun. When it can’t transpose the note any higher because of the limitation on the maximum voltage output by the DAC, the software forces it to wrap round underneath; so rather than a F4 which it can’t reach, it (should) play an F0, which makes for some unexpected but pleasantly varied lines.
Here’s a quick demo of the transpose function from the MS20 perspective; I’d already recorded a short sequence:
I’m finding designing the physical user interface design fascinating, and difficult. I always wanted synths and sequencers with a knob or button per function, but now I come to designing my own instrument, I can easily see why the 80s thing was to sling in a screen and an alpha dial. And like I say, it’s a pain to wire up the buttons. There’s also a temptation just to keep adding features ad infinitum. Currently I’m giving in to it, although I’ll need to make decisions if I’m ever going to get it boxed up.
I’ve been looking at the Mutable Instruments Shruthi-1 for inspiration for a box, particularly Hannes Pasqualini’s Shruti-1, which looks really good. Slowly getting there… will get it done eventually.